nginx学习
一.静态资源服务器
1.使用nginx实现静态资源服务器,修改nginx配置(conf/nginx.conf)
server {
       listen       8000;
       server_name  localhost;

       第一种:(默认方式)
       location / {
           root   html;
           index  index.html index.htm;
       }

       第二种:(修改默认网页)
       location = /test.html {
           root   html;
       }

       第三种:(修改访问文件夹)
       location /testnginx {
           root   E:/nginx/;
           index etest.html;
       }

       error_page   500 502 503 504  /50x.html;
       location = /50x.html {
           root   html;
       }

   }
2.参数说明:
listen: 监听的端口号。
server_name: 浏览器上输入的域名。
location: 表示url匹配,/表示全部匹。
root: 表示匹配成功之后进入的目录。
index: 表示默认的页面。
3.三种访问方式说明
3.1 .默认访问:
3.2 .修改默认网页
在html目录下新建test.html
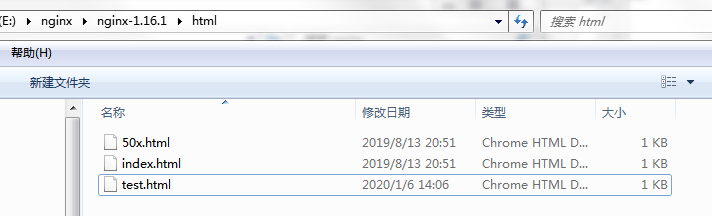
测试

3.3 .修改访问文件夹
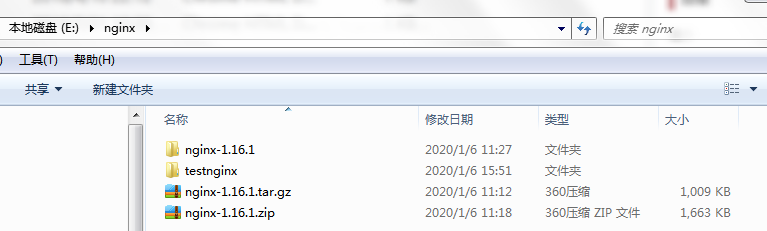
默认的文件夹(html文件夹)是可以改变的,nginx默认访问的是nginx.exe同一级别目录的html文件夹,我们可以修改location和root来修改这个访问的文件夹。
步骤一:在E:\nginx 目录下新建testnginx 文件夹
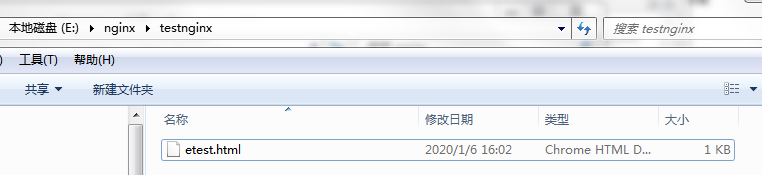
步骤二:添加 etest.html页面
二.根据域名访问不同路径
1.前期准备
在 C:\Windows\System32\drivers\etc 目录下修改 hosts文件,增加两域名

# localhost name resolution is handled within DNS itself.
127.0.0.1 server1
127.0.0.1 server2
2.文件新增配置
2.1 在E:\nginx\nginx-1.16.1\html 新增 server1.html
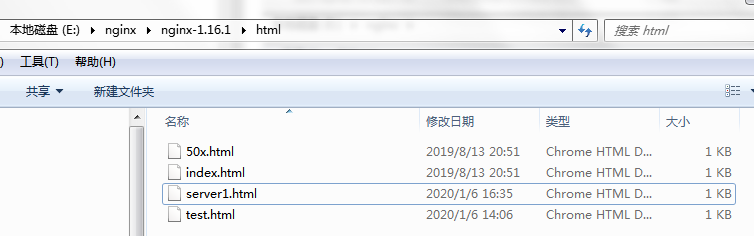
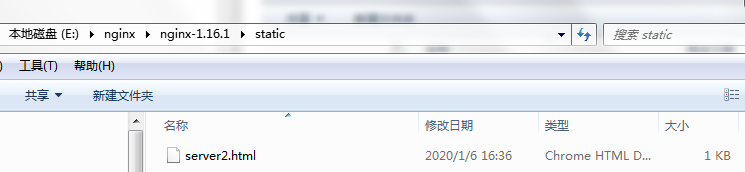
2.2 新建static文件夹,并新增 server2.html
3.修改nginx配置(conf/nginx.conf)
server {
        listen       8000;
        server_name  server1;

        location / {
            root   html;
            index  server1.html;
        }

        error_page   500 502 503 504  /50x.html;
        location = /50x.html {
            root   html;
        }
}

server {
    listen       8000;
    server_name  server2;

    location / {
        root   static;
        index  server2.html;
    }

    error_page   500 502 503 504  /50x.html;
    location = /50x.html {
        root   html;
    }
}
4.浏览器访问测试


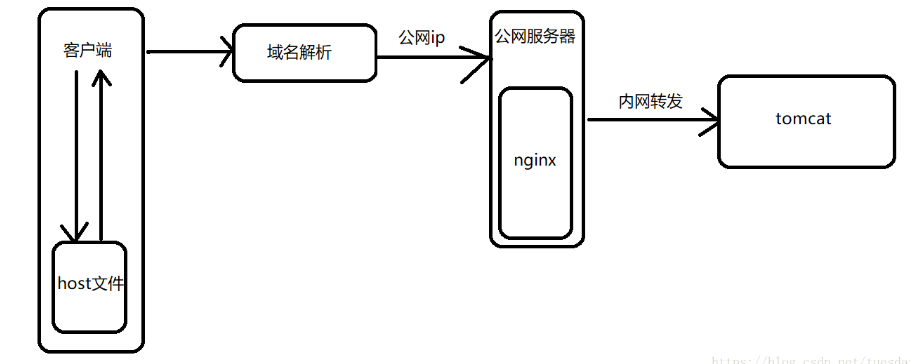
三.反向代理
## 1.概念理解
反向代理:nginx拦截动态请求之后转发给某个tomcat。
2.反向代理作用
隐藏真实的访问ip地址,访问的最多也就是公网的ip,但是具体tomcat在那个ip是不知道的,这样就能减少tomcat被攻击,提高了服务器的安全性。
3.流程图
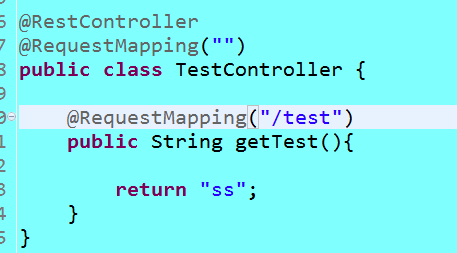
4.搭建springboot服务,启动端口配置为 8888
5.修改nginx配置(conf/nginx.conf)
server {
listen 8000;
server_name server1;
location / {
root html;
index index.html;
}
location /test {
root html;
proxy_pass http://192.168.18.106:8888;
index index.html;
}
error_page 500 502 503 504 /50x.html;
location = /50x.html {
root html;
}
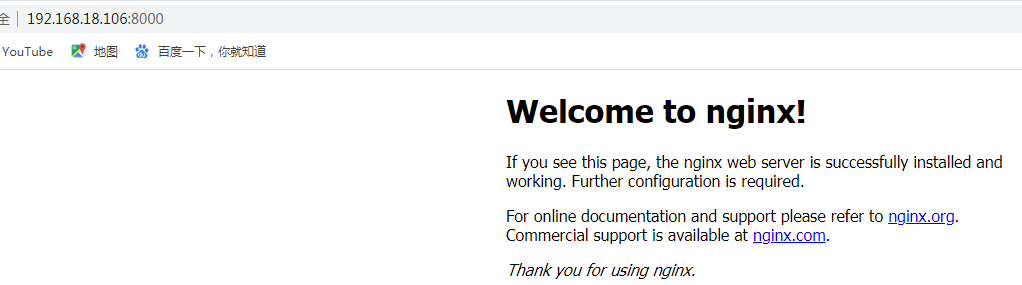
}浏览器访问: http://server1:8000/test
说明:
proxy_pass: 127.0.0.1可替换成任何一个通的内网地址,此ip表示真实访问的tomcat所在的位置。
四.Location匹配模式及顺序(1-6优先级降低)
(1)location = /uri地址
    =开头表示精确匹配,只有完全匹配上才能生效。

(2)location ^~ /uri地址
    ^~ 开头对URL路径进行前缀匹配,并且在正则之前。

(3)location ~ 正则表达式
    ~开头表示区分大小写的正则匹配。

(4)location ~* 正则表达式
    ~*开头表示不区分大小写的正则匹配。

(5)location /uri地址
    不带任何修饰符,也表示前缀匹配,但是在正则匹配之后。

(6)location /
    通用匹配,拦截所有,但是优先级最低,只有前面都没有被拦截的情况下,才会被拦截到这里。
五.负载均衡
1.概念
为了解决高并发问题,负载均衡服务器拦截所有的请求,采用负载均衡算法,分配到不同的tomcat上。
2.作用
减少单台tomcat的压力
3.upstram XXX: 表示负载均衡服务器
4.三种基本的负载均衡算法
轮询、权重、ip绑定。
前期准备工作:
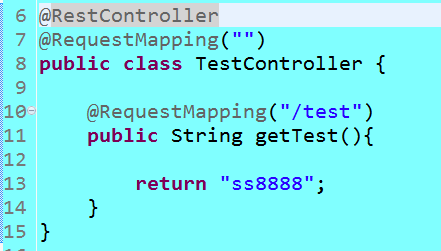
(1) 修改服务端口 8888 ,修改返回字符串为ss8888,启动服务
(2) 修改服务端口 8889 ,修改返回字符串为ss8889,启动服务
(1).轮询 (nginx默认的负载均衡算法)
从上到下按顺序轮流
例如:127.0.0.1:8082轮完就轮到127.0.0.1:8081,127.0.0.1:8081轮完就轮到127.0.0.1:8082
修改nginx配置(conf/nginx.conf)
注意:testNginx的地方需要保持一致
upstream  testNginx{
    server 127.0.0.1:8888;
    server 127.0.0.1:8889;
}

server {
    listen       8000;
    server_name  localhost;

    location /test {
        root   html;
        proxy_pass http://testNginx;
        index  index.html;
    }

    error_page   500 502 503 504  /50x.html;
    location = /50x.html {
        root   html;
    }
}
测试结果: 依次出现 ss8888 , ss8889
(2).权重(服务器配置好就多轮几次,或者想让某台服务器多轮几次。)
轮到次数的比例,数字越大表示轮到的概率越大。
当weight都设置为1的时候和轮询没什么区别
修改nginx配置(conf/nginx.conf)
upstream  testNginx{
    server 127.0.0.1:8888 weight=1;
    server 127.0.0.1:8889 weight=2;
}

server {
    listen       8000;
    server_name  localhost;

    location /test {
        root   html;
        proxy_pass http://testNginx;
        index  index.html;
    }

    error_page   500 502 503 504  /50x.html;
    location = /50x.html {
        root   html;
    }
}
测试结果: 依次出现 ss8888 , ss8889 ,ss8889
(3).ip绑定
第一次访问的时候,nginx会根据该ip通过哈希算法,算出某个值,然后去分配tomcat,当你第二次访问,第三次访问。。。之后的任何一次访问都去请求第一次访问的tomcat。
修改nginx配置(conf/nginx.conf)
upstream  testNginx{
    server 127.0.0.1:8888;
    server 127.0.0.1:8889;
    ip_hash;
}

server {
    listen       8000;
    server_name  localhost;

    location /test {
        root   html;
        proxy_pass http://testNginx;
        index  index.html;
    }

    error_page   500 502 503 504  /50x.html;
    location = /50x.html {
        root   html;
    }
}
测试结果: 若第一次访问 8888 端口 则一直出现 ss8888 ;若第一次访问 8889 端口 则一直出现 ss8889
5.故障转移参数配置(提高故障转移速度)
(1).proxy_connect_timeout:nginx向tomcat发起连接,即第一次握手等待tomcat回应的超时时间,tomcat的这次回应只是说明能正常连接,并没有响应具体请求的内容。
(2).proxy_send_timeout: nginx将请求发送给tomcat的超时时间,应该是确认能正常连接之后向tomcat发送真正的业务请求。
(3).proxy_read_timeout: tomcat接受到真正业务请求之后,nginx等待tomcat响应具体请求的内容的超时时间。差不多可以理解tomcat处理具体请求时间的最大值,也就是tomcat必须在这个时间内做完业务逻辑处理。
文章标题:nginx学习
发布时间:2020-01-06, 18:08:19
最后更新:2020-01-06, 18:08:20